Full Version: Need Acrylic Help
From: Vicky (ANDERI) [#1]
19 Feb 2007
To: ALL
I know I've seen this posted somewhere else ... I'm probably the one who posted it in the first place (I dunno ... can't remember ... they say the mind's the first thing ... sorry ... what was I saying? :S ). A search of the forum got me nowhere, at any rate.
Anyhow, can anyone give me some tips on how to avoid swirl marks on acrylic? It's like the top layer is melting a little and getting blown around by the air assist. Would leaving the protective film on help, and how would that affect the end result (edge cut)? Should I slow down? Speed up? Increase power? Decrease power?
Thanks muchly! :-)
From: Harvey only (HARVEY-ONLY) [#2]
19 Feb 2007
To: Vicky (ANDERI) [#1] 19 Feb 2007
I do not have air assist so cannot answer the stated question.
But I always leave the paper on when cutting acrylic. It eliminates the occasional smoke melt/deposit.
If I have to raster it first, I peel, raster, then apply paper transfer tape before cutting.
From: Boz (CHEDDARHEAD) [#3]
19 Feb 2007
To: ALL
From: Ozzy Fox (CLIVEGARAWAY) [#4]
19 Feb 2007
To: ALL
Are you trying to cut the acrylic or engrave on it? Raster engraving should be fast speed, cutting the acrylic should be slow speed and without the protective covering on! I've never encountered swirl marks in any case. Do you have piccies of the problem?
regards Clive.
From: Mike (MIKEN) [#5]
19 Feb 2007
To: Vicky (ANDERI) [#4] 19 Feb 2007
My way is a little different in that I prefer to leave the paper mask on for both rastering and cutting. I believe this reduces my clean up time and my chances of scratching the piece. I use this paper to run a low power test for proofing as well.
Obviously, it requires a higher power setting for rastering to get through the paper and still allow for enough engraving depth. I almost always engrave from the back unless I have to do a color fill.
Power, speed and ppi settings are very important in cutting so I would advise spending some time tweaking those settings on scrap material so you know what to expect of various settings.
From: Rodney Gold (RODNEY_GOLD) [#6]
19 Feb 2007
To: ALL
Elevating the acrylic , Increasing air assist pressure and directing it into the cut will solve this , the melt will be ejected thru the cut and onto the surface below the elevated pex.
I cut all pex with the layers front and back , it decreases the chances of damage big time.
EDITED: 19 Feb 2007 by RODNEY_GOLD
From: Vicky (ANDERI) [#7]
19 Feb 2007
To: Ozzy Fox (CLIVEGARAWAY) [#4] 20 Feb 2007
- leave the manufacturer's covering on one side
- paint the other side of the whole sheet with 1st colour (we're reverse-engraving)
- raster then vector (we're on a vector grid when we do this)
- remove piece from vector table
- paint fill the freshly rastered areas with 2nd colour
- bevel the edges with a router
This seemed to work well. Previously, we weren't leaving the manufacturer's coating on the sheet, and we got the melting swirl marks. I'll try to get a pic of the swirl marks for you, Clive. At any rate, leaving the manufacturer's coating on the bottom seems to stop the swirl marks and helps eliminate scratching when bevelling (since we're doing it with the un-rastered side face-down). Unfortunately, I think we upped the power a little too much last night, as the whole piece warped as soon as it was cut free of the surrounding material. >.< We'll try again tonight to find a happy medium in terms of power.
We're using an acrylic that we bought at the local hardware store, not from any of the main laser suppliers (Rowmark, IPI, etc...). The laser suppliers don't seem to have what I'm looking for in the proper thickness. :S What we bought from the hardware store has a sort of plastic film on it, which apparently cuts quite well (it practically disintigrated last night), so I don't think we'll need to up the power too much to compensate. In all honesty, the layer of black paint we laid on presented more of a problem than the protective film did.
Thanks for the words of wisdom, folks. I'll keep you posted on our progress. :-)
ETA: Here's a picture (a little difficult to see, but it's there):
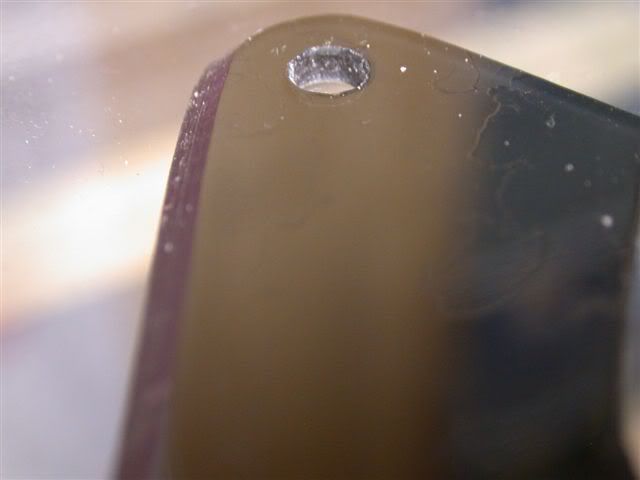
EDITED: 19 Feb 2007 by ANDERI
From: Stunt Engraver (DGL) [#8]
19 Feb 2007
To: Vicky (ANDERI) [#7] 20 Feb 2007
It sounds like the acrylic you bought from the hardware store may be extruded, as opposed to cast acrylic.
Extruded acrylic is much more prone to melting.
EDITED: 19 Feb 2007 by DGL
From: Mike (MIKEN) [#9]
20 Feb 2007
To: Vicky (ANDERI) [#8] 20 Feb 2007
I have an idea that it's the plastic coating that causes the swirling effect you're describing. Try transfer paper instead and see if that doesn't help.
David's right about the hardware store plastic being extruded.
From: Harvey only (HARVEY-ONLY) [#10]
20 Feb 2007
To: Vicky (ANDERI) [#7] 20 Feb 2007
I have seen that one or two times when using cast acrylic, extruded is far worse. (If the rastered lettering is not snow white, it is extruded.)
When the covering is lifting from vacuum or air assist, the heat going under the coating gets trapped and causes these types of marks. If you have it on the painted side also it sounds like heat affecting the acrylic. Again extruded is much worse than cast.
On acrylic I would not recommend two low power passes, the acrylic expands enough to make the second cut in a different place than the first cut.
Check to be sure that the vacuum line is totally free of bends and flats that might be reducing the suck. Be sure all metal pipe connections are tight and covered with tape to stop air from leaking in and reducing the vacuum. A faster changeover of air might solve the problem.
EDITED: 20 Feb 2007 by HARVEY-ONLY
From: (Brian) (MOSTLY_HERE) [#11]
20 Feb 2007
To: Vicky (ANDERI) [#7] 20 Feb 2007
Hi Vicky,
I cut and raster acrylic all the time. I do not usually color as you are doing. The only time I had trouble with some product was when I got some PEGT instead of acrylic. It's a product like polycarbonate. I was told you can cut it, but I had poor results. It was very brittle and turned a bit in color after vector cutting. How thick are you trying to cut? I cut both cast and extruded and have not had any troubles like the ones you are describing.
From: Rodney Gold (RODNEY_GOLD) [#12]
20 Feb 2007
To: ALL
From: Vicky (ANDERI) [#13]
20 Feb 2007
To: Rodney Gold (RODNEY_GOLD) [#12] 20 Feb 2007
The results are in. I left the backing on the acrylic, it didn't affect my cutting power at all, and there are no swirl marks. Yippee! :D
I'm cutting 0.090". My air assist is almost always on, but it might not be bang-on in positioning. At any rate, leaving the backing on works for plenty of reasons (swirl marks, scratches while bevelling, scratches during shipping, etc...), so I think my best bet is just to leave it there until the customer wants to install the thing.
Thanks a bunch, folks! :-)
EDITED: 20 Feb 2007 by ANDERI